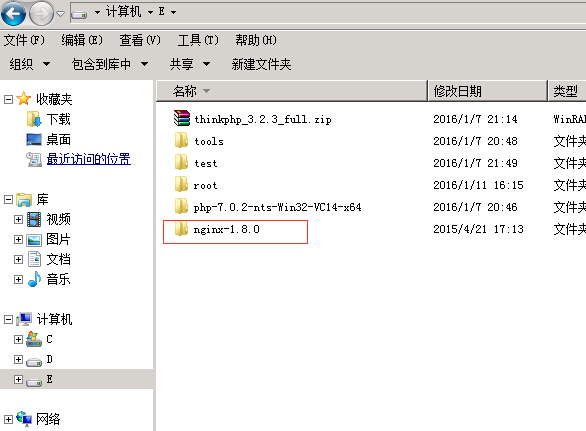
一、 下载Nginx的最新的windows稳 版本1.8.0,解压到E盘根目录,如图所示:
二、 配置Nginx,找到conf文件夹下的nginx.conf文件,进行配置,我把自己的配置文件贴出来,共大家参考
#user  nobody;

worker_processes  4;


error_log  logs/error.log;

error_log  logs/error.log  notice;

error_log  logs/error.log  info;


#pid        logs/nginx.pid;


events {

    worker_connections  1024;

}


http {

    include       mime.types;

    default_type  application/octet-stream;


    #log_format  main  '$remote_addr - $remote_user [$time_local] "$request" '

    #                  '$status $body_bytes_sent "$http_referer" '

    #                  '"$http_user_agent" "$http_x_forwarded_for"';


    #access_log  logs/access.log  main;


    sendfile        on;

    #tcp_nopush     on;


    #keepalive_timeout  0;

    keepalive_timeout  65;


    #gzip  on;


    server {

        listen       8080;

        root E:/root;

        index  index.html index.htm index.php;


        error_page  404              /404.html;

        location = /404.html {

        return 404 'Sorry, File not Found!';

        }

        error_page  500 502 503 504  /50x.html;

        location = /50x.html {

        root   E:/root; # windows用户替换这个目录

        }


        location / {

        try_files $uri @rewrite;

        }


        location @rewrite {

        set $static 0;

        if  ($uri ~ \.(css|js|jpg|jpeg|png|gif|ico|woff|eot|svg|css\.map|min\.map)$) {

            set $static 1;

        }


        if ($static = 0) {

            rewrite ^/(.*)$ /index.php?s=/$1;

        }


        }


        location ~ /Uploads/.*\.php$ {

        deny all;

        }


        location ~ \.php/ {

           if ($request_uri ~ ^(.+\.php)(/.+?)($|\?)) { }

           fastcgi_pass 127.0.0.1:9000;

           include fastcgi_params;

           fastcgi_param SCRIPT_NAME     $1;

           fastcgi_param PATH_INFO       $2;

           fastcgi_param SCRIPT_FILENAME $document_root$1;

        }


        location ~ \.php$ {

        fastcgi_pass 127.0.0.1:9000;

        fastcgi_param SCRIPT_FILENAME $document_root$fastcgi_script_name;

        include fastcgi_params;

        }


        location ~ /\.ht {

        deny  all;

        }

    }


    # another virtual host using mix of IP-, name-, and port-based configuration

    #


    # another virtual host using mix of IP-, name-, and port-based configuration

    #

    #server {

    #    listen       8000;

    #    listen       somename:8080;

    #    server_name  somename  alias  another.alias;


    #    location / {

    #        root   html;

    #        index  index.html index.htm;

    #    }

    #}


    # HTTPS server

    #

    #server {

    #    listen       443 ssl;

    #    server_name  localhost;


    #    ssl_certificate      cert.pem;

    #    ssl_certificate_key  cert.key;


    #    ssl_session_cache    shared:SSL:1m;

    #    ssl_session_timeout  5m;


    #    ssl_ciphers  HIGH:!aNULL:!MD5;

    #    ssl_prefer_server_ciphers  on;


    #    location / {

    #        root   html;

    #        index  index.html index.htm;

    #    }

    #}


}
说明:上面的root 表示网站根目录,我设置的是E盘下的root,并且我将nginx的html文件夹下的两个文件拷贝过去了,并且创建了一个index.php文件,代码就一句 phpinfo();。其中 Server 部分参考了本站某高人的代码,再次表示感谢。
三、打开命令行,进入nginx目录,输入start nginx,如图
 ,
,窗口一闪而过,打开浏览器,输入loclhost:8080,如果看到下图,表示nginx 运行成功了。

四、去php官网下载最新的php的windows版本,我下载是市nts 的64位版本,同样的解压到E盘根目录,如图

五、进入php目录,找到php.ini-development,改为php.ini,在此不对php做配置,用默认配置。
六、打开命令行,进入php目录,输入如下命令:php-cgi.exe -b 127.0.0.1:9000 -c php.ini,这样php以cgi方式运行了,但此时命令行窗口不能关闭
七、然后浏览器中访问index.php,出现下图,表示php运行起来了

八、然后把下载的thinkphp3.2.3版本解压到root,访问localhost:8080,出现下图,

这时候我们的thinkphp3.2.3 也运行起来了
好了,今天就写这么多,以后再发布一片文章对php进行配置,并把mysql加进入。
最佳答案