要实现这个功能大概分为以下三个步骤:
1. 要使你的web editor支持"分页标识"插入
2. 内容中通过"分页标识"来拆分内容
3. 给内容加上分页
ok 现在我们来实现第一步, 当然很多编辑器已经支持了分页标识,这里我使用的是 kindeditor ;其他编辑器的话自己研究研究了。
解决:步骤一
打开kindeditor.js修改如下
1. 找到 items:
items : [

        'source', '|', 'undo', 'redo', '|', 'preview', 'print', 'template', 'code', 'cut', 'copy', 'paste',

        'plainpaste', 'wordpaste', '|', 'justifyleft', 'justifycenter', 'justifyright',

        'justifyfull', 'insertorderedlist', 'insertunorderedlist', 'indent', 'outdent', 'subscript',

        'superscript', 'clearhtml', 'quickformat', 'selectall', '|', 'fullscreen', '/',

        'formatblock', 'fontname', 'fontsize', '|', 'forecolor', 'hilitecolor', 'bold',

        'italic', 'underline', 'strikethrough', 'lineheight', 'removeformat', '|', 'image',

        'flash', 'media', 'insertfile', 'table', 'hr', 'emoticons', 'baidumap', 'pagebreak',

        'anchor', 'link', 'unlink', '|', 'about'

    ],
在这个参数中添加一个自定义按钮 'pagehr'; 这里我们给他加到 hr 后面,如下:items : [
'source', '|', 'undo', 'redo', '|', 'preview', 'print', 'template', 'code', 'cut', 'copy', 'paste',
'plainpaste', 'wordpaste', '|', 'justifyleft', 'justifycenter', 'justifyright',
'justifyfull', 'insertorderedlist', 'insertunorderedlist', 'indent', 'outdent', 'subscript',
'superscript', 'clearhtml', 'quickformat', 'selectall', '|', 'fullscreen', '/',
'formatblock', 'fontname', 'fontsize', '|', 'forecolor', 'hilitecolor', 'bold',
'italic', 'underline', 'strikethrough', 'lineheight', 'removeformat', '|', 'image',
'flash', 'media', 'insertfile', 'table', 'hr', 'pagehr', 'emoticons', 'baidumap', 'pagebreak',
'anchor', 'link', 'unlink', '|', 'about'
],2. 找到 hr : function() {
return this.inserthtml('<hr />');
},在下面加入:pagehr : function() {
return this.inserthtml('<hr class="page" />');
},3. 找到 _each(('selectall,justifyleft,justifycenter,justifyright,justifyfull,insertorderedlist,' +
'insertunorderedlist,indent,outdent,subscript,superscript,hr,print,' +
'bold,italic,underline,strikethrough,removeformat,unlink').split(','), function(i, name) {
if (shortcutKeys[name]) {
self.afterCreate(function() {
_ctrl(this.edit.doc, shortcutKeys[name], function() {
self.cmd.selection();
self.clickToolbar(name);
});
});
}
self.clickToolbar(name, function() {
self.focus().exec(name, null);
});
});一样在hr 后面添加一个参数 pagehr, 如下:_each(('selectall,justifyleft,justifycenter,justifyright,justifyfull,insertorderedlist,' +
'insertunorderedlist,indent,outdent,subscript,superscript,hr,pagehr,print,' +
'bold,italic,underline,strikethrough,removeformat,unlink').split(','), function(i, name) {
if (shortcutKeys[name]) {
self.afterCreate(function() {
_ctrl(this.edit.doc, shortcutKeys[name], function() {
self.cmd.selection();
self.clickToolbar(name);
});
});
}
self.clickToolbar(name, function() {
self.focus().exec(name, null);
});
});4. 好了。js 修改完毕, 接下来得修改下样式. 打开kindeditor/themes/default/default.css; 添加以下css.ke-icon-pagehr {
background-position: 0px -1248px; /*这里的坐标看你有没修改过kindeditor的图片,自己修改下*/
width: 16px;
height: 16px;
}
.ke-toolbar .ke-pagehr {
overflow: hidden;
height: 1px;
clear: both;
}5. 搞定css 我们可以修改下图标. 我用的是默认的皮肤所以找到kindeditor/themes/default/default.png; 用ps或其他图片处理软件处理下这个图片,当然你也可以不处理,看你喜欢里面哪个现成的图标就直接用吧.
kindeditor 修改完成, 效果如

好了. 接下来tp要怎么处理呢?
如果你看到了这里,那么恭喜. tp 函数我已经写好了。直接点击复制右键黏贴吧.
/**

* 内容分页

* @param text content

* @param int  page

* @param string needle 分页标识

*/

function contentPage($content, $needle = '<hr class="page" />'){

    //根据分页标识来拆分分页

     $pageContent = explode($needle, $content);

    //$_GET['p'] 内容分页的参数

       $page = isset($_GET['p']) ? intval($_GET['p']) : 0;

    $contentNowPage = $page > 0 ? $page-1 : 0;

    echo $pageContent[$contentNowPage];


    if(($pageCount = count($pageContent)) > 1){

        $pageStr = '<div class="clear"></div><div class="page_content">';

        for($i = 1; $i <= $pageCount; $i++){

            $style = '';

            if($page == $i){

                $style = 'class="cur"';

            }

            $pageStr .= '<a href="?p='.$i.'" '.$style.'>'.$i.'</a>';

        }

        $pageStr .= '</div>';

        echo $pageStr;

    }

}
嗯哼,代码我就不一行行解释了. 略微注释了下,自己看注释吧; 代码中有几个css.如下.page_content{text-align:center; padding:5px 0;}
.page_content a{ border:1px solid #E3E3E3; margin:0 5px; color:#666; padding:0 5px; display:inline-block;}
.page_content a:hover,
.page_content a.cur{ border:1px solid #F09601; color:#F09601;}
.clear{clear:both;}好好好,接近尾声; 前台调用简直就是弱爆了.我都不好意思贴出来了,可以我不贴你看到这里还不要摔鼠标 ^ _ ^. ~~~~~~~~~~~~~~~~~~~~~~~~~~~~~~~~~~~~~~飘逸的分割线~~~~~~~~~~~~~~~~
剁手 .~_~ 哈哈哈, 代码如下; 拿起你手中的鼠标订购吧。 啊~复制吧
{:contentPage($info['content'])}大功告成,效果如下: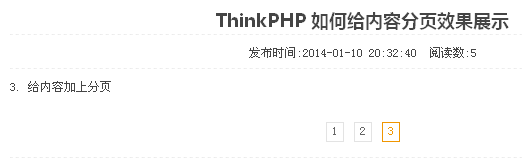
测试地址: http://www.chajiandaquan.com/tech/73.html